How to Record a Transaction
There are 2 ways to record a Sale.
The first way is to import transactions from your online bank account or PayPal account. The second way is to manually record a Sale. This is the way we will discuss here.
How to Record a Sale
To record a new sale, follow these few steps.
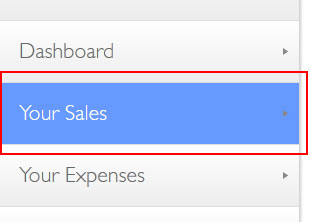
1. Click on Your Sales in the main menu
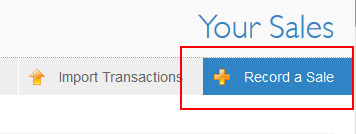
2. Click the Record a Sale button
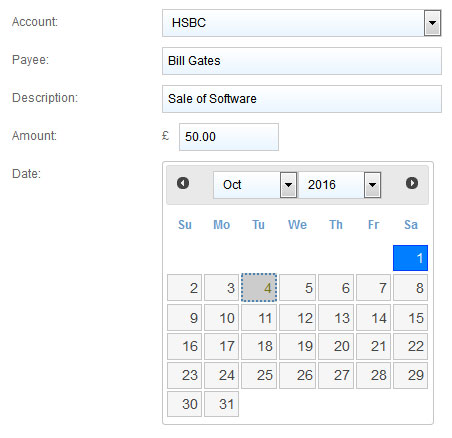
3. Enter the Sale details
First, select the Account the sale relates to. If you have not already set up your Accounts, go back and set these up first, in Your Accounts.Second, enter the details of the sale.The Payee is your client – enter their name or business name here.The amount should contain numbers and a decimal place only, in the format 1.50 . If a number is incorrectly entered, it will be corrected for you when you save.
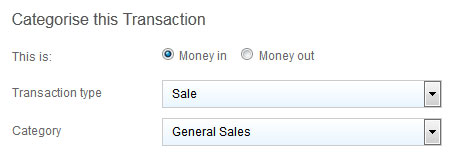
4. Categorise the Transaction
You can assign this sale to any of the Sales Categories you have defined. If you have not already set up your Sales Categories, please go back and set these up in Your Sales > Options.Depending on your company structure, you can select alternative Transaction Types too, such as Dividends Out, or Interest Payments In.
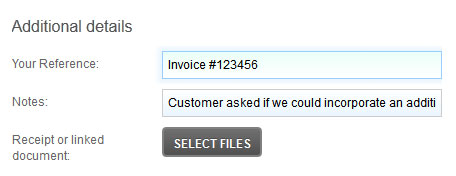
5. Add additional details
This entry is optional, but is useful to help track your transactions and relevant information.Your Reference can be used to input any internal reference you have for this transaction, such as an invoice numberUpload Receipts can be used to digitally store receipts and linked documents. Click the SELECT FILES button and find the documents you want to store with this transaction.
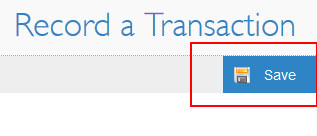
5. Save the Transaction.
When you’re ready, click Save
All Done!
Your transaction has been created. Your dashboard should now show a change.